Red Velvet Cake Mix Cookie Bars
This post may contain affiliate links. If you make purchase after clicking a link, I may receive a commission at no extra cost to you.
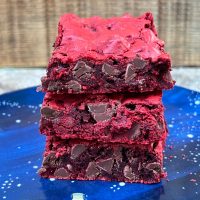
Moist, a little bit chewy, and loaded with even more chocolate from the chocolate chips, these Red Velvet Cake Bars are a real treat! And, you won’t believe how easy they are to make, because it all starts with a box of cake mix!

Red Velvet Bars
I LOVE sweets. Cookies, pies, cakes, and of course, these Red Velvet Cookie Bars.
They’ve got just the right amount of sweetness to them without being too sweet, and I’ve made them even better by adding in some MORE chocolate!
Can you have too much chocolate?
The best part about these red velvet cake mix cookie bars is how easy they are to make. A box of cake mix, a few other common ingredients, a quick mix, bake in the oven, and you’re done!
Kids love them in their lunch boxes, guests love them at parties and backyard cookouts, and I love a piece with a cup of coffee during afternoon breaks. They’re so pretty, too, and with that vibrant red color, I just have to have these around Christmas and Valentine’s Day!
Easy and tasty – what’s not to love?

Ingredients for Red Velvet Bars
- 1 package red velvet cake mix – Any brand will do. Grab a few when they’re on sale!
- Eggs – Large eggs.
- Brown sugar – Light brown sugar is perfect for this recipe.
- Butter – Melt it in the microwave.
- Water
- Chocolate chips – Use milk chocolate or semisweet chocolate chips.
Love the flavors of red velvet? Try my Red Velvet Cinnamon Rolls and my Red Velvet Cheesecake!
How To Make Red Velvet Cake Mix Cookie Bars
This recipe couldn’t be any easier, y’all! Just grab a bowl and your electric mixer. Heck, you can even make this cake mix recipe with a good old wooden spoon!
- Preheat your oven to 375-F.
- Add the cake mix, eggs, brown sugar, melted butter, and water to a large bowl.
- Beat the batter with an electric mixer or use a whisk or wooden spoon.
- Stir in the chocolate chips.
- Spray a 9×13 baking dish with non-stick cooking spray.
- Spread the batter into the baking dish and bake for 25 minutes or until an inserted toothpick comes out clean. An offset spatula can help you out with this job.
- Cool, cut, and serve!
For some extra sugary goodness, top with a dollop of Cream Cheese Frosting!
How To Cut Red Velvet Cookie Bars
Thanks to all the chocolate and the cake mix, these red velvet cake cookie bars are very moist and a little bit gooey. You can cut them while they’re still in the baking dish, turn them out onto a cutting board and then cut them, or to get the cleanest cuts, follow these tips:
- Cool the cookie bars in the baking dish on the counter for about 2 hours or until they’re cool to the touch.
- Pop the whole baking dish of bars into the freezer for about an hour. They won’t freeze completely, but they will harden up so that you can get nice clean cuts.
- Cut the slightly hardened cookie bars with a large, clean knife and wipe it clean between cuts.
Storage
Once baked, these easy cookie bars will keep on the counter in an airtight container for a few days. To keep them longer, freeze them. Cut them, then put them in a covered freezer-safe container and freeze for up to a month. Let them thaw on the counter before eating.
Frequently Asked Questions
Yes, you bet they are! Most of the ingredients are in the cake mix, you just need to add a few other ingredients, then mix and bake! It couldn’t be any easier!
You can use your favorite chocolate chips or chunks, and I also love the mini chips in this Red Velvet Cookie Bar recipe. Milk chocolate and semisweet chocolate taste the best, but you could also use dark chocolate or even white chocolate!
Yes, you can, and it’s so much easier! All the flour, baking soda and baking powder, and flavor is already in the cake mix, so you just have to dump it into a bowl, add a few more ingredients, mix and bake!
You may also like these delicious recipes!

Red Velvet Cake Mix Cookie Bars
Ingredients
- 1 Package red velvet cake mix
- 2 eggs
- 1/2 Cup packed brown sugar
- 1/4 Cup butter melted
- 1/4 Cup water
- 2 Cups chocolate chips milk chocolate or semi-sweet both work
Instructions
- Preheat oven to 375 degrees.
- Combine the first 5 ingredients. Beat for 2 minutes with an electric mixer - or beat really good by hand with a whisk. Stir in 2 cups of chocolate chips.
- Spray a 9x13 baking dish with non-stick cooking spray. Spread the batter into the pan, and bake for 25 minutes or until a toothpick inserted in the center comes out clean.